Boat Design & Manufacturing
Boat Design & Manufacturing crafts the core of our boat, designing and building the crucial hydrodynamic, structural, and waterproofing systems.
Our unique trimaran design has a hollow center hull that houses all the electronics, maximizing stability while minimizing weight. We leverage simulation tools like Ansys Fluent and Orca to optimize the boat’s performance on the water, ensuring stability, efficiency, and speed. Each structural component is designed with a high factor of safety for reliability. We employ Ansys static structural and modal analysis tools to verify our designs, followed by testing to validate their performance. The electronics bay is accessed through sealed openings, designed with redundancy, and tested for waterproofing. Most components are custom-made, utilizing a variety of techniques, including composite fabrication, machining, laser cutting, and 3D printing.
Our future goals include transitioning from hand layups to vacuum infusion to make lighter and stronger hulls, fabricating forged composite parts, developing composite sandwiches with superior strength-to-weight ratios for the frame, and building a framework within LS-DYNA for crash simulations.

Hull Manufacturing
Amas
The amas were made using foam cores with wooden tops and bottoms that were carefully cut and sanded to the desired shape. These foam cores were then used in a fiberglass layup to provide waterproofing and strength for use in the water. After more sanding, the amas were then coated with an epoxy barrier coat and spray painted to our final desired result. We started by cutting and sanding four individual profiles using insulation foam. Each profile was two inches thick, which added up to our desired height of eight inches per ama.
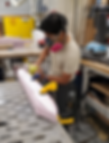
The profiles were then glued together, using aluminum rods that intersected the profiles to help line them up.

The glued foam core was then sanded down to a smooth cohesive shape.
We then used a laser cutter to trace the shape of the top and bottom profiles of the amas, and used a jigsaw to cut them out. The wood profiles were glued onto the foam cores and then sanded down to once again make a cohesive shape.

The foam cores are made of polystyrene foam, so in order to protect them from the polyester resin we first coated them in a layer of epoxy resin, then used an epoxy tie coat to allow better adhesion with the polyester resin. For the fiberglass layup we used 2 layers of chopped strand mat fiberglass with polyester resin. The gaps in the fiberglass layup were filled in with epoxy fairing compound and then sanded to a smooth shape.

After achieving a nice smoothness on the surface, the amas were coated in a barrier coat and then spray painted.
Main Hull
The main hull was made using a higher density foam that was outsourced to our school’s CNC machine in order to achieve a very smooth and very accurate foam core that was used for our fiberglass layup. The foam core was then taken out and replaced with a wooden frame to allow space for our boat’s electronic systems. After sanding the fiberglass shell of the main hull down to an acceptable level of smoothness, it was then coated in a barrier coat and spray painted for appearance.
Our school’s CNC was critical in helping us make both an accurate foam core for the shape of the main hull and a perfectly drilled deck for the top of the main hull.

For our fiberglass layup we opted to use a “sandwich” strategy. By making the innermost and outermost layers out of chopped strand mat fiberglass we were able to ensure a smooth inside and outside, and the middle layer of biaxial weave provided most of the hull’s strength.
Following our fiberglass layup, we had to remove all of the foam that was still inside of the fiberglass shell we had just created.

We then created a wooden frame to replace the foam using laser-cut pieces of wood that fit the shape of the hull nicely, 3D printed connecting brackets that made sure each of the wood pieces stayed in place, and our CNC’d deck that had inserts made for each piece of laser-cut wood. The wood was then glued to each other for additional strength.

After a little bit of sanding, the frame fit nicely into the fiberglass shell. Expanding Gorilla Glue was used to keep the frame in place.

The top edges of the fiberglass shell were cut down with a dremel and sanded, then a new layup of chopped strand mat fiberglass was used in order to waterproof the edge between the deck and the hull.
Any gaps in the fiberglass were filled in by epoxy fairing compound, and was then sanded smooth.

A layer of barrier coat was used to protect the boat from the water. Afterwards the hull was spray painted for appearance.
